
Hello again, and welcome back to The Art of Caesura!
I hope you enjoyed the 9th birthday party for this blog last week. The birthday posts are always quite an undertaking, but I enjoy putting in the effort to mark the occasion. As I mentioned in the post, it's also nice to force ourselves to reflect from time to time!
So at the very tail-end of last week's post, we saw the blog's birthday present: the largest model of the year (or at least the largest undertaking): The Gallowdark Terrain!
So I actually wrote today's post almost exactly 1 year ago! It was January 2024! I've updated it slightly, but by the end, you'll see why it is only appearing on the blog now...
***
Two years ago the Gallowdark terrain was released for the "Into the Dark" Kill Team season. Subsequently, this was introduced into larger 40k in the "Boarding Actions" game mode. It was my hobby goal for 2023 (and then again for 2024) to get this terrain painted. I really REALLY love this terrain and I think both game modes (Into the Dark for Kill Team, and Boarding Actions for 40k) will really be up my alley). In fact I did actually play a game of Into the Dark - My Black Templars in an Intercession Squad vs. my buddy's Death Corps of Kreig. I think he won, but the image of one of my 8-foot, trans-human super soldiers barrelling down one of those corridors towards his beleaguered army men still stands out in my mind.
This terrain is beautifully detailed, really immersing you into the bowels of an Imperial space ship / space hulk / space station. You could even imagine that it is a station on the surface of a planet. The only problem with the terrain (aside from some of the tight connection tolerances which I plan to file) is that there's so bloody much of it! I could (and may yet) spend several months getting it all together! Because of that I have to be really smart about how I'm going to get it all done. I bought 2 sets of the Kill Team-sized boxes so that I would have enough for Boarding Actions. That's over 70 pieces of terrain!
I watched LOADS of videos about how people have tackled this monumental hobby project, I've found the techniques that I like from some of them and I'm mixing in some of my own.
So after spending about 3 weeks of evenings cleaning and assembling all of the terrain, I was excitedly ready to start painting.

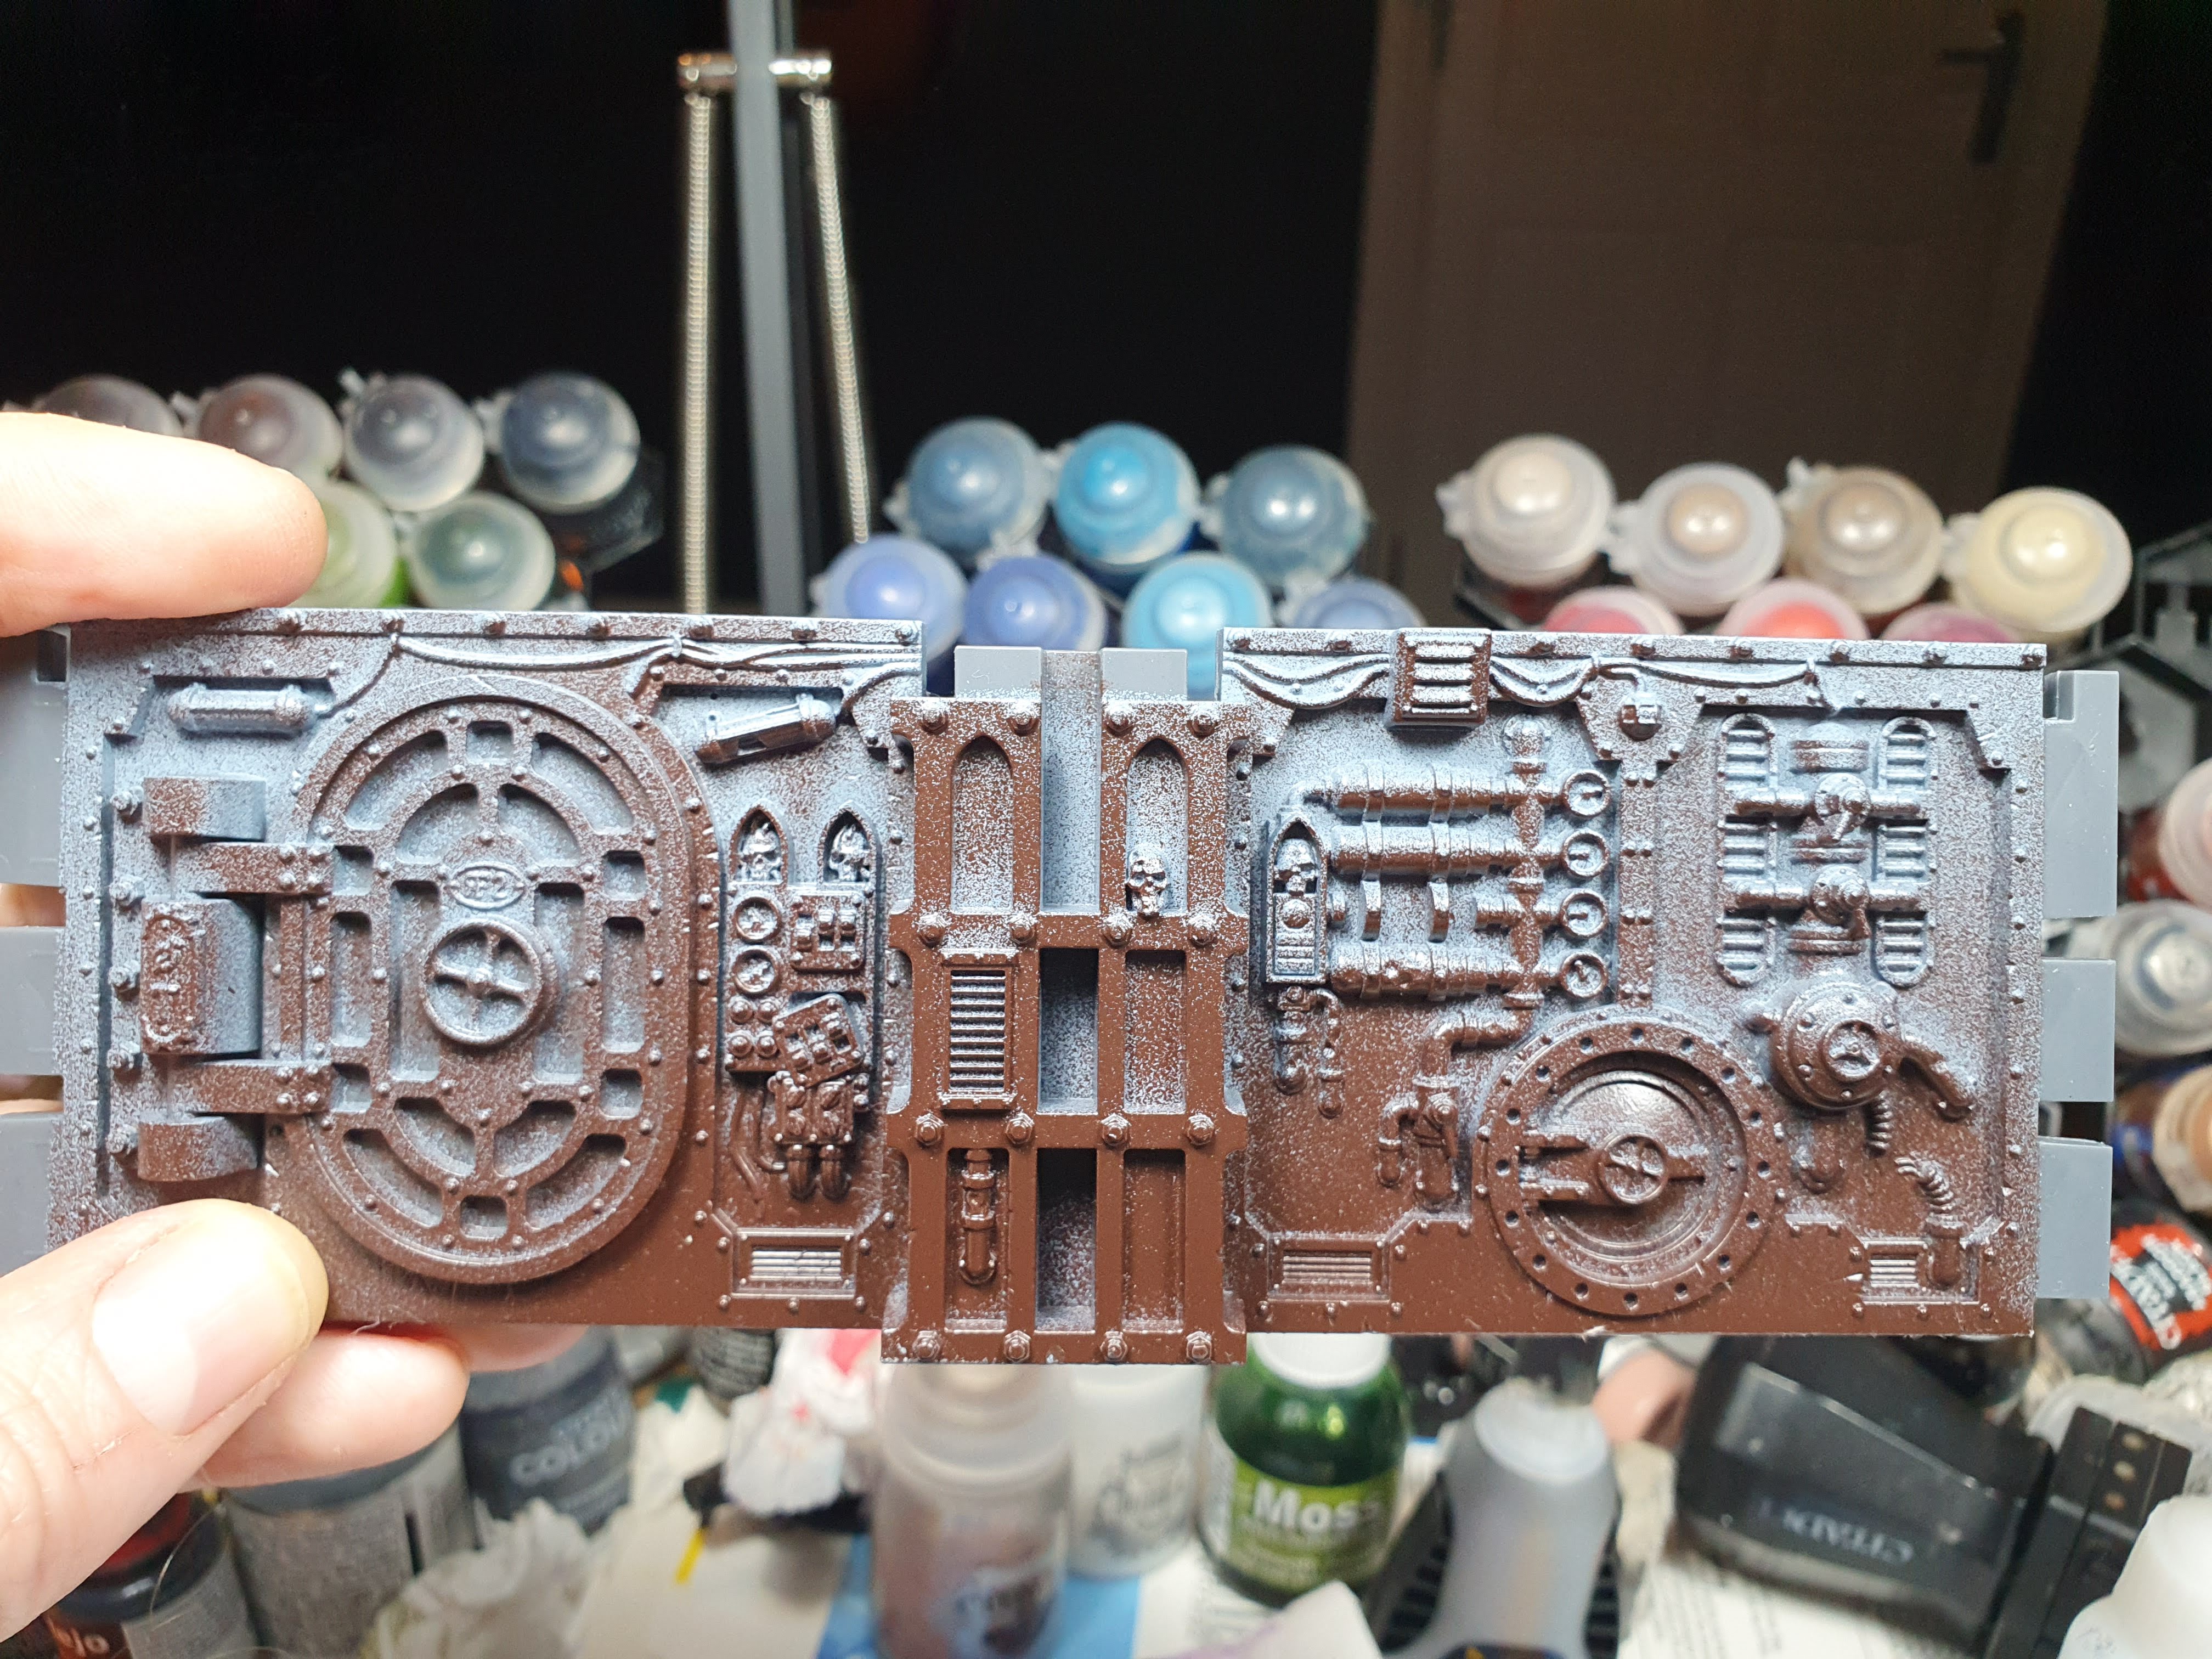
I'm probably most closely following Ash (from Guerrilla Miniature Games)'s technique. He started by spraying all of the pieces "Painter Touch Espresso" and then sprayed from above with "Painter's Touch Coastal Chalk Paint" unfortunately, after a great deal of searching, I found that this specific paint does not exist in Ireland. And it would be ridiculously expensive to import. So I used "Painter's Touch Slate Blue" instead (a bit lighter in hue).


My first two problems already reared their heads: firstly, I misunderstood how Ash did it and I accidentally sprayed the light blue on first and then the brown on from below (kind of the opposite of how Ash did it). The problem with this is that it was really hard not to get a lot of overspray too high up the walls, which meant some of the upward-facing surfaces (where dirt and grime would naturally collect) were un-sprayed) also, although it says right on the can that the Espresso paint is meant to have a satin finish, mine dried extremely glossy (yes I have read the millions of threads online about this issue - I didn't shake it enough / it was too cold / too humid / too dry / I applied it too thick / too many coats). Anyway I have been using spray paints for over 20 years and am quite familiar with their usage so I don't think it was user error, but that is beside the point. The point is, I ended up with glossy dirt. But I'll come back to this...


In order to ever finish this project, I decided to only add a few colours. I sprayed all metal parts (all of the "caps" for on top of the walls, and all of the machinery that provides cover and scatter terrain) with Leadbelcher


I then started drybrushing everything with Dawnstone, before swapping and drybrushing EVERYTHING with Grey Seer.


I then started in on the "white" details with Wraithbone. This was mostly skulls.

And then I painted the red details with Contrast Flesh Tearers Red, this was mostly handles, valves, switches and some wires.

So, let's circle back to the glossy dirt issue, I didn't really think this would be too much of a problem. I planned to spray the finished terrain with my AK Ultra-matte varnish with the airbrush at the end, but when I tested this, the varnish wouldn't even stick to the glossy paint! Now we're in trouble...

Remember, that glossy brown paint (which is supposed to represent dried dirt and dust) is not wet, it is fully dried and cured. Look at that sheen!

While I was planning my next move, I started in on the next colour: AK Duraluminum. I kept this colour to the larger pipes, fans, battery cells, and I plan to paint it along the tops of all of the wall segments. I plan to do one more colour after this - a copper - for all of the smaller pipes, and some of the wiring, plaques and other details.
While working through the Duraluminum, I remembered that I had a can of "Purity Seal" that I had used over a decade ago (and it frosted a bunch of my miniatures) - it was Games Workshop's own satin varnish that I think has been replaced by Munitorum Varnish. I had read a lot about this "frosting" issue and, in this case, I was content to put it down to "user error" at the time: perhaps I sprayed it too thick or in too cold or humid an environment etc. I hoped, however, that - with all the chemicals in the rattle can, it would bind better to the glossy terrain than its airbrushed vis-a-vis did.
Rather than ruin a whole board's worth of terrain (and a couple weeks of work), I performed a little experiment. I got both the Purity Seal and a different cheap "matte" spray-on varnish that I found at a local arts and crafts shop and I warmed them both in a bowl of warm water. I then sprayed them in a very controlled environment - just onto a little corner piece of terrain. I left them for 8 hours to fully off-gas and cure and then scrutinized them.


I was delighted to find that BOTH of them worked really well! The Purity Seal, despite being marketed as "satin" was even more matte than the matte varnish! Anyway, they looked great.
So in well-ventilated area, with respirator mask on, I sprayed all of the terrain with this 10+ year-old Purity Seal to knock back the shine on the brown. And it worked!


From here, I finished the steel and then moved on to copper. It was around this time that I began to lose the will. There are 68 walls and corners etc, and then another whole bunch of scatter terrain that came with Kill Team Into the Dark, so we're probably looking at repeating each of these steps across several areas of maybe 90 pieces of terrain. Just to run some of the numbers: just for the elements that are painted by paint-brush (AFTER having sprayed each piece with 2 different colours, drybrushed each piece and then varnished each piece) that works out to over 1000 areas to be hand painted (and that's just up to and including the copper stage - there would still be many details to hand paint after that).


So, I made it through the copper on maybe one third of the terrain and then it was at this point that I took a break for a couple of months. I played Cyberpunk 2077 (which I hadn't played at launch, and so avoided all that controversy) and then painted some Hellboy minis...
***
And a couple of months turned into the bones of a year! I got deep into the Hellboy minis and then returned to my beloved Black Templars (as you'll have seen from the weekly blog posts). I pulled this terrain back out in December and decided to have another go at getting 'er done!
We shall continue to log my progress with this, my most ambitious project, next week right here on The Art of Caesura!
Watching: The Traitors (Season 1)
Next Week:
Into the dark...
Comments
Post a Comment
Tell me all...