There is peace in the swamp,
though the quiet is Death.
~Bret Harte
Welcome to a swampy setting today on The Art of Caesura!
If you haven't had a chance to check out last week's post, I would suggest that it would be a good place to start. Last week we discussed the process of painting Forge World's Preyton, this week we're going to look at making a cool base for it!
Before I started painting the Preyton, I had this image of it lurking through a swamp by moonlight, hence the super-desaturated colour scheme. All that remained...was to create the swamp!
I knew I wanted to include stagnant water to really sell the idea of the swamp. Initially I hoped to paint the reflection of the moonlight in the water, but as you'll see, I ran into enough issues with the water alone, so had to abandon that idea.
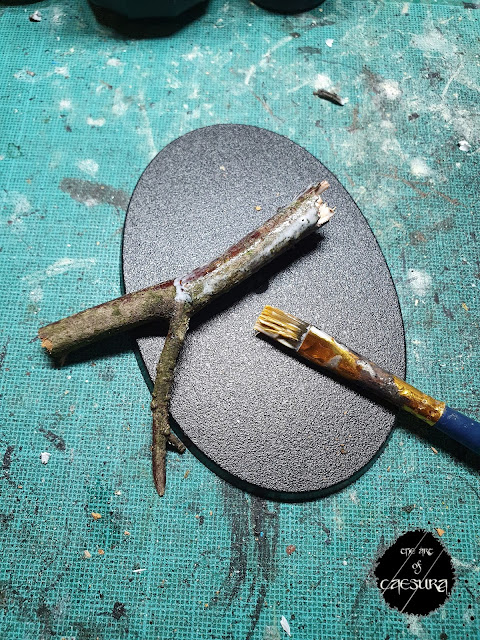
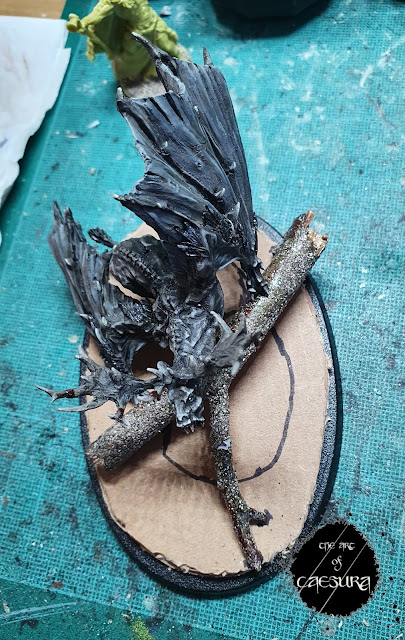
I started with just a stick that I broke into an interesting shape to complement the Preyton's twisted posture - stalking over a fallen tree. I clipped the rocky crag from under it's left talon and ensured the stick was positioned in such a way that the height of his talon would be correct.
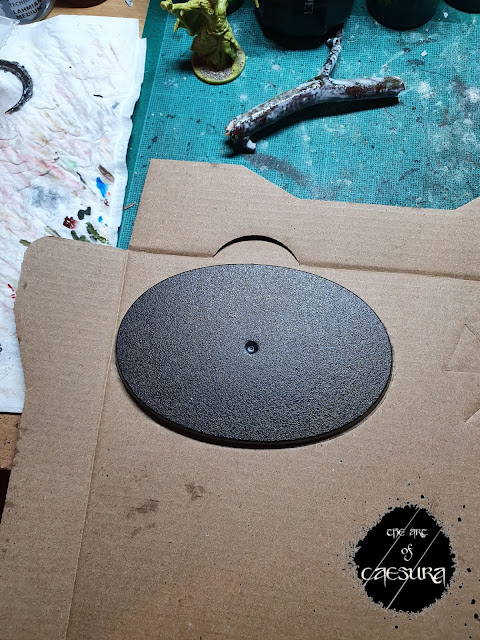
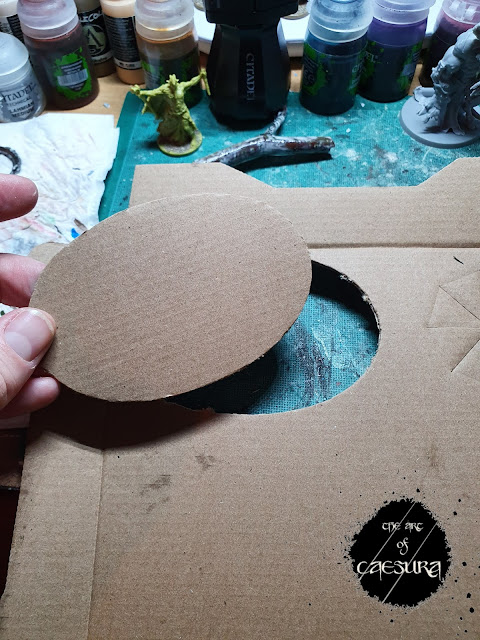
Next I had to make a depression for the water to go in. This meant building up the base of the...base a bit. I used some corrugated cardboard for this.
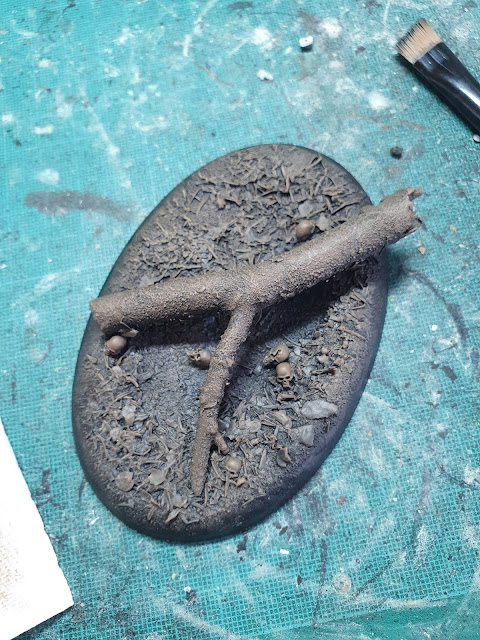
Then came the painting proper. I kept it quick and messy, drybrushing many thin layers of Steel Legion Drab first mixed with black and working up through Ushabti Bone. I wanted to keep the overall tone dark and neutral browns to give some separation from the greys on the Preyton. I didn't highlight where the water would go, to give a greater illusion of depth.
though the quiet is Death.
~Bret Harte
Welcome to a swampy setting today on The Art of Caesura!
If you haven't had a chance to check out last week's post, I would suggest that it would be a good place to start. Last week we discussed the process of painting Forge World's Preyton, this week we're going to look at making a cool base for it!
Before I started painting the Preyton, I had this image of it lurking through a swamp by moonlight, hence the super-desaturated colour scheme. All that remained...was to create the swamp!
I knew I wanted to include stagnant water to really sell the idea of the swamp. Initially I hoped to paint the reflection of the moonlight in the water, but as you'll see, I ran into enough issues with the water alone, so had to abandon that idea.
I started with just a stick that I broke into an interesting shape to complement the Preyton's twisted posture - stalking over a fallen tree. I clipped the rocky crag from under it's left talon and ensured the stick was positioned in such a way that the height of his talon would be correct.
I then sealed the wood with PVA glue. And (not shown) I coated it in sand to give a bit more texture.
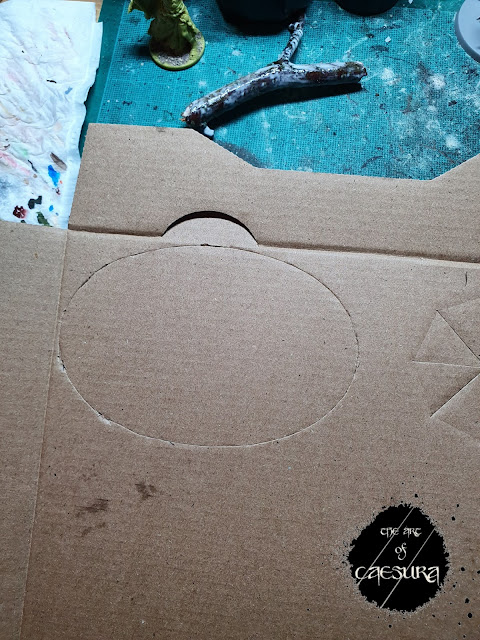
Next I had to make a depression for the water to go in. This meant building up the base of the...base a bit. I used some corrugated cardboard for this.
With the cardboard cut to size, I positioned the Preyton to see where I would have the pool of water and marked this out...
...before cutting it out of the top layer of cardboard.
Next, out came the Milliput to smooth the edges.
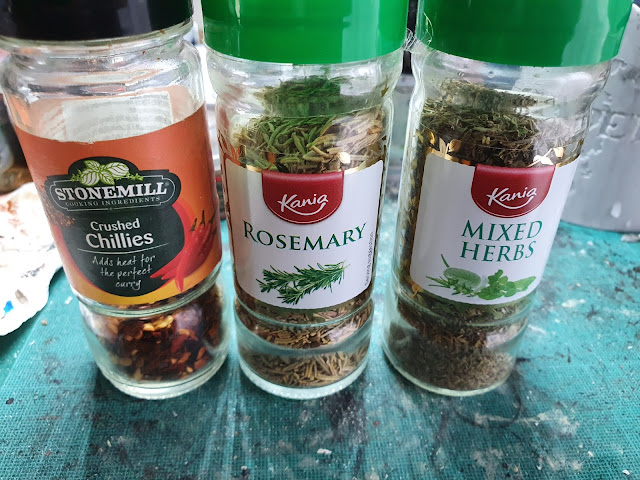
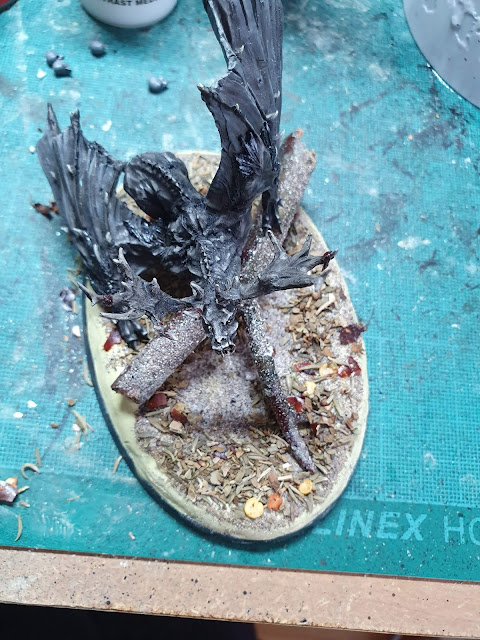
To heighten the realism of the swampy setting, I wanted to have loads of texture and leafy detritus on the ground. I had heard of people using herbs for this but had never tried it myself. So I raided the spice rack to look for herbs and spices that would scale well. I settled on chillies, rosemary and mixed herbs.
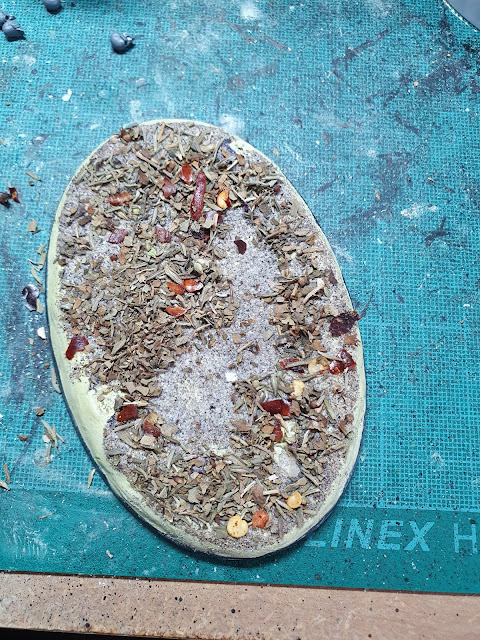
I started by coating the base with sand, and once dry I applied another layer of PVA glue, then I just went mad, sprinkling the herbs everywhere (including the underside of the stick). It actually smelled glorious at this stage: like a big pizza pie!
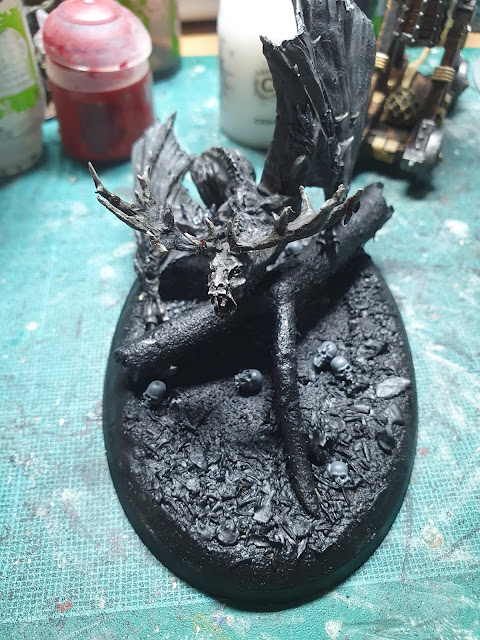
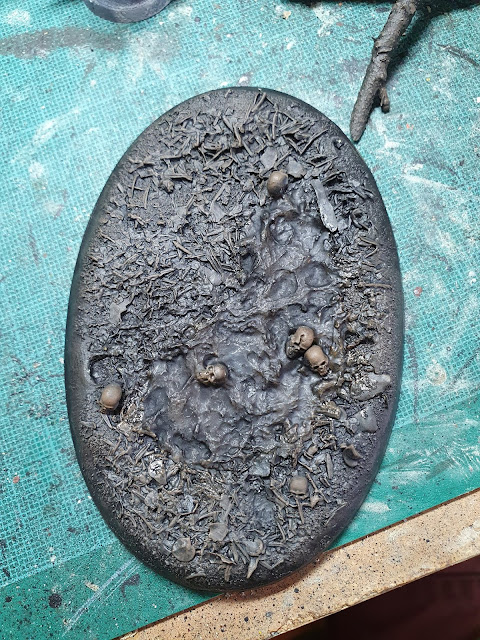
I applied another layer of PVA to seal it all in, then painted the whole base black and popped on some skulls.
I am nothing if not enthusiastic, and this next bit really demonstrates that. I decided to create a "pool of water" effect never having done it before and not having any "still water effects" products.
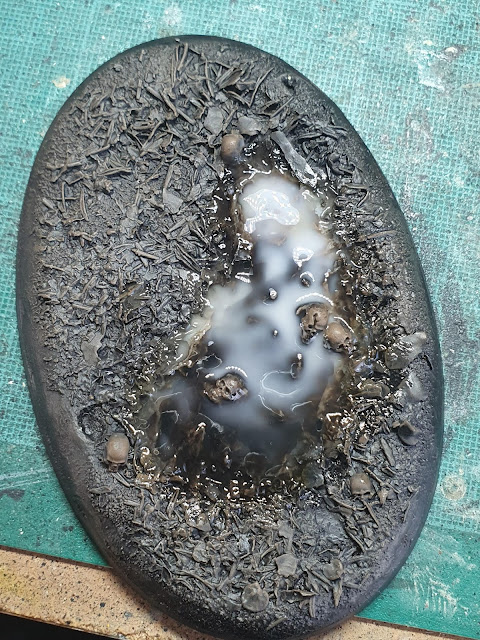
What I did have is the Vallejo Extra Heavy Gel stuff that I use for my Kharadron Overlords bases - but I hasten to add that this isn't designed for a "still water" effect, quite the opposite actually. Undaunted, I slapped a bit of the Extra Heavy Gel down and left it overnight to dry.
The next day it was still a little cloudy as you can see below
So I said "screw this" and painted over the lot with the brown tones, but the Heavy Gel (as it is intended) had left a rough, choppy texture which didn't really suit a stagnant pool. I was beginning to despair.
Next, I tried pouring a thick layer of gloss varnish on to see if that would work, but after leaving it overnight, it too had gone cloudy and milky. Grrrr.
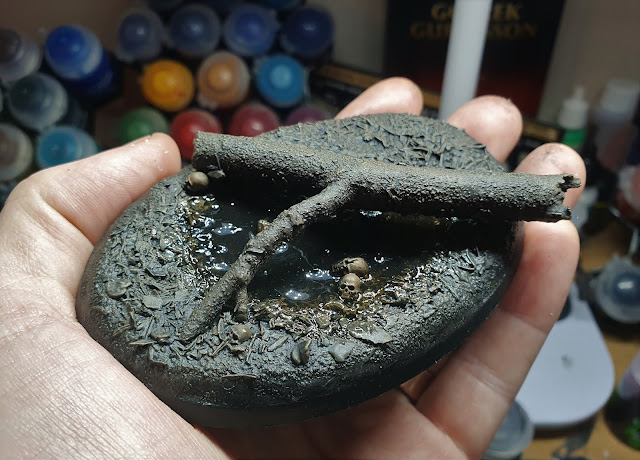
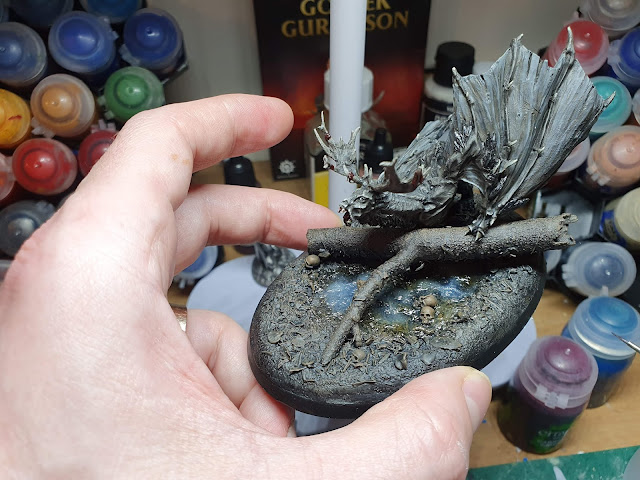
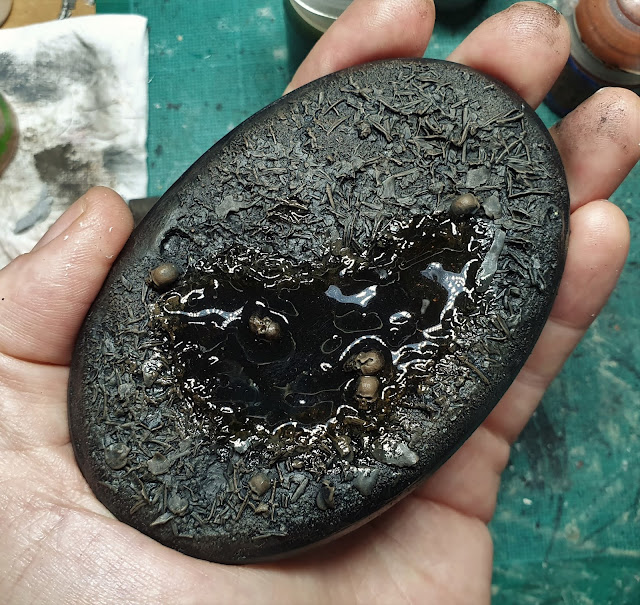
So rather than messing with it anymore, I set it aside and worked on something else for a few days. When I pulled it out again a few days later, lo and behold, It had worked! It seems I just had not been giving the various products time to dry (cure?) and so, in the end, I was really happy with how it turned out.
The water is opaque enough that you can't see the bottom, strengthening the eerie, swampy feel; but it is still somewhat transparent so that it looks like water.
I really had to resist highlighting the skulls up to Ushabti Bone and beyond. I really wanted the highlights on the Preyton's face to be the lightest points of the whole model. I like that some of the skulls are kind of hard to see, it rewards the viewer for spending time looking at the model.
Tune in next week for the finished model, right here on The Art of Caesura!
Listening: Wolf Totem - The HU
Reading: The Guest List - Lucy Foley
Watching: The Fall (season 1)
Next Week:
Seeking its own shadow...











That was brilliant! The herbs...the water, you are a genius!
ReplyDeleteHaha thanks! "Genius" might be a bit of a stretch, but I'll take it ;)
Delete