"Micro changes in air density, my ass."
- Ripley, Alien
Hi all, welcome back to The Art of Caesura!
I'm sending you loads of positive vibes, especially if you need them today!
Today's post is a continuation of last week's, so if you haven't had a chance to check out that one, I'd suggest you do so...
Well, well, well, "taking a break" from the Gallowdark turned into a year-long hiatus! I've had another kid since I originally wrote the last post! But you know what, I've painted a TON of fun Hellboy miniatures and even did a few big jobs on my Black Templars, so it was just the break I needed from this mammoth terrain project. But now I want to throw myself back into it and finish it off!
So let's pick up right where we left off last week, and that was with copper!
I had mentioned that it was the copper that did me in the last time. I had made it about a third of the way through all of the copper before giving this project a rest...a hibernation!
So, I painted all the copper! And what you can see here is just the walls, in two huge bags off to the side are all the doodads!
My next plan was to give a unifying wash of some brown tone to tie all the details together. I could have used Streaking Grime, but I kind of didn't want to waste all of it on terrain, especially when I think it will be coming in very handy with Trench Crusade on my painting horizon.
Rather than an enamel wash, I decided on an oil wash. I borrowed some of my wife's oil paints, thinned them with mineral spirits and dabbed them on.
I tried Burnt Umber first which was a very similar hue to the Espresso spray that I had used.
Next, I tried Burnt Sienna (I swear, they can never get Umbers or Siennas right; they're always either burnt or raw!)
My personal preference was for the darker Burnt Umber, the Burnt Sienna was a little too diarrhoeal for me and it too radically shifted the underlying grey-blue. It would be great for some isolated rust streaks.
So off I went, dabbing on Burnt Umber...
...And then dabbing it back off again ad infinitum.
It took a million years, but when it was done, the walls looked much...
...the same. But a bit grimier. And grimier's better!
With all of the "background" details of the walls complete across the whole set, it was time for the fun part - adding in the proper details. At time of writing I'm still working on these details across the whole set and truth be told I don't know if I'll have them all completed for my three-way Boarding Actions game in a few weeks, but I'll keep chugging away. I did bring one panel up to completion for the blog's birthday post a couple of weeks ago and as a "proof of process" kind of thing.
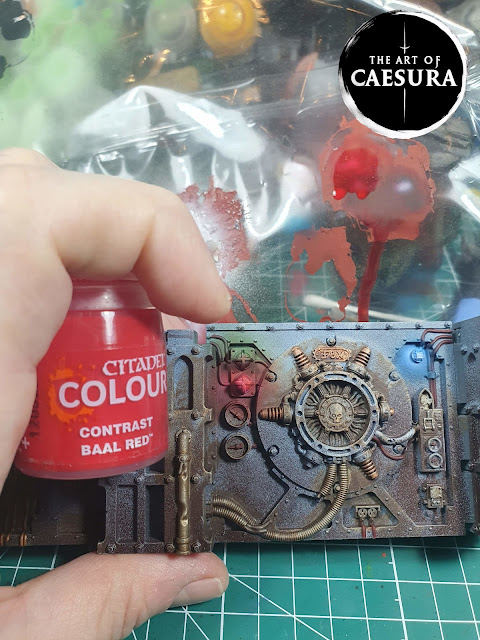
I started by painting all of the lights and functioning screens with a puff of white ink from my airbrush.
I realized that I had already messed up! I want to paint all of the recurring vertically stacked larger lights green and red (to look like the kind of lights in Jurassic Park which show the power is either on and everything's dandy (green light illuminated) or not (red light illuminated). Obviously, given the state of the Gallowdark, I want it to look like only the red light is illuminated in each case - so I shouldn't have given the green light an initial puff of white. Anyway, I'll try to remember for the next 300 times!
I painted the incorrectly illuminated green light with Creed Camo.
Oh and as per the picture two up, I plan to paint all of the other lights pale blue to harmonize with the blue walls of my Gallowdark. I sprayed Talassar Blue for this test piece, but for the rest of the ship I think I'll try to get a lighter Contrast blue.
To paint the glowing lights, I gave a puff of white, then a puff of whatever colour that light is meant to be (Blue, Green or Baal Red as the case may be). This established the OSL glow around the light.
Then I gave another puff of white right into the centre of the light and then ANOTHER very light puff of the colour over that.
I finished the OSL by busting out my brush and edge highlighting the surfaces closes to the emanating light with white.
This whole process was extremely time consuming on this test model as I was having to clean out my airbrush between every colour change, but when I complete this process on the rest of the ship it will be much quicker because I will batch paint everything!
I gave some of the copper areas a wash of Nihilek Oxide for some nice verdigris, and then painted the whole band along the top of the wall metal.
I think it looks pretty good with this level of detail - it is just supposed to be terrain after all - and I think it will look fantastic when it's all on the table together.
Watching: The Traitors (UK) Season 1, Final Episode - eek!
Listening: New World in the Morning - Roger Wittaker
Next Week:
Unmatched zeal...


Comments
Post a Comment
Tell me all...