His cloak was his crowning glory:
sable, thick...and soft as sin.
George R.R. Martin
Welcome back to The Art of Caesura!
I hope all is well with you, and I'm sending positive vibes your way, especially if you need them today.
Last week we started looking at my thoughts behind the Sword Brethren and the hair that I sculpted for them. Today we shall cast our eyes on the first part of painting these glorious miniatures.
Regarding my painting process, I recommend you check out this detailed evergreen post about how I paint each element of my Black Templars. Today, I'm going to focus on one somewhat unique detail of these knightly marines, their long cloaks.
I have a funny trajectory with painting cloaks. I used to have no bother at all with them: paint them their base colour, slap on a wash, repaint the base colour on the raised surfaces and that was about it.
As I have progressed as a painter, I find myself using less and less washes / shade paints. I still use Nuln Oil / Agrax Earthshade to weather metals sometimes, but I guess I have started using other methods (layering / blending) that I feel allow me to build up more visual contrast with more control than a wash.
One area where I have struggled more and more as I have moved away from washes is painting large areas of fabric - namely cloaks.
I have not exercised the patience to blend such large areas very effectively as you can see on Marshal Grymm, but I still think it looks better than having loads of shade paint pool unnaturally at the bottom of a cloak.
So this time I decided to try something new: airbrush! Unfortunately, because I hadn't planned on airbrushing these guys from the beginning, I completed their armour first (using this process) and then didn't bother to mask off the work I'd done, so I ended up with a load of overspray and had to paint much of their armour again. BUT...that aside, I'm REALLY happy with how the airbrush worked for this application. And it only took a couple of minutes!
Starting from a hairy-brushed on coat of Steel Legion Drab, I airbrushed thinned Ushabti Bone on to the raised areas.
I then sprayed on thinned Wraithbone.
And gave a final dusting of white ink.
I was so happy with the level of smoothness.
The contrast was greater than it appears in these photos under my powerful daylight bulbs. I tried taking a photo under "normal" light in the kitchen, but the photo didn't turn out much more accurate.
So here I was with my incredibly smooth cloaks, but I was left with two issues. I did want them to be smooth, but I'm not a huge fan of the pure airbrushed look; I wanted to get in there and create a little texture. Also, while keeping the blends smooth, I wanted to bring it back into a darker range of hues. So, as Bob Ross regularly said whenever he started painting a big ol' tree in the foreground of his oil paintings, it was time to be brave. If this next stage messed up, I would have to start the cloaks again from scratch.
I decided to filter my freshly painted, pristine cloaks with a brown enamel wash.
After painting 6 months work of Reichbusters minis using the "reductive" style of painting, I have become quite familiar with it. This technique, popularized on The Grimdark Compendium, where you filter with an oil or enamel wash and and then remove much of the paint with mineral spirits and a q-tip or, in this case, just a dry make-up sponge.
I'm really happy with how it turned out. I then moved on to adding more texture by brushing on the initial colours again, starting with Ushabti Bone.
Having completed the cloaks, I'm thrilled to have found a new technique for these large fabric areas that I'm happy with. I must just remember to paint them first (or ideally, separately) next time, so as not to have to repaint much of the armour due to overspray.
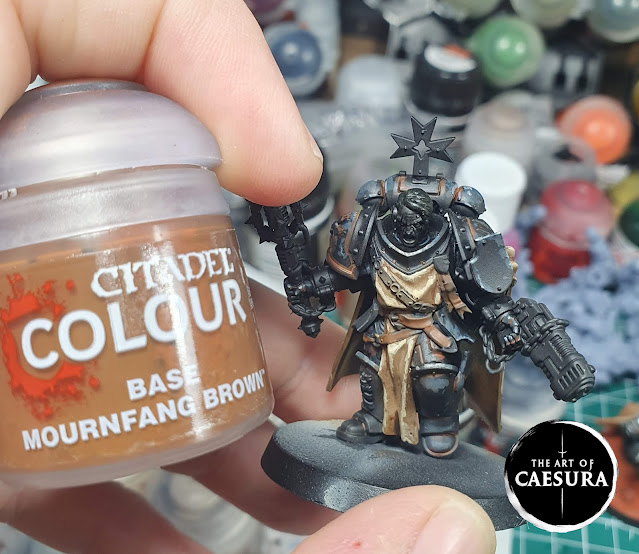
The rest of the model was painted pretty much as per my usual recipe at the link above. I painted the belts and pouches with Mournfang Brown, but I painted the reds a little differently. I painted the gun casing and crusader ribbons using my usual recipe of: Mephiston Red, Fleshtearers Red, Evil Sunz Scarlet.
But I painted the trim on their pauldrons quite differently to make their armour look more like a aged relic. I started with this paint that I fell in love with while painting my Hellboy minis, a nice "brick" coloured red: Burnt Red.
After washing it with Carroburg Crimson, I then highlighted it with Burnt Red, mixing in more and more Cadian Fleshtone.
With final edge highlights of pure Cadian Fleshtone.
I'm in love with how the reds are differentiated! I'll have to remember this recipe, hmmm...I should really document it somewhere...
And there we are! I've found a new way to paint cloaks - AND a new way to paint reds as a bonus!
I'll see you next week as we continue our look at these courageous crusaders right here on The Art of Caesura!
Reading: The Night Interns - Austin Duffy
Watching: Dear Santa (2024)
Next Week:
Face paint!


Comments
Post a Comment
Tell me all...