Decal: "picture transferred from a specially prepared paper to some other surface," by 1909, shortening of decalcomania (1864), from French décalcomanie, from décalquer (18c.) "transferring of a tracing from specially prepared paper to glass, porcelain, etc." (in vogue in France 1840s, England 1862-64), from de- "off" + calquer "to press," from Italian calcare, from Latin calcare "to tread on, press," from calx "heel" (see calcaneus)
Online Etymology Dictionary
Welcome back to another glorious Friday on The Art of Caesura!
So, for the past few weeks we've been looking at my first Bowl Team. I've gone into detail about how I painted their armour and faces, but I kept teasing that I would go into detail about how I did the decals at a later time...well, that time has come!
Before we get started, and just so we're all on the same page, I have always called them "decals" (and it was only as I was writing this post that I began to wonder why - see the fascinating etymology above) but many call them transfers. Same thing.
Decals are a great way to apply uniformity across a number of models (or areas of application on one model) without needing to freehand. They're useful for squad markings, tank markings, or player numbers - as I've done here. Like all painting / modelling, the decals need to look like they're part of the finished model, otherwise they'll be jarring and break immersion.
I hope this guide will be useful. I would recommend that you read the whole guide first before you start, just so you have a clear idea of which order you're doing things. I know it looks long, but I've intentionally itemized every step for clarity. Once you've done one or two, you'll be applying decals from start to finish in a couple minutes.
What you'll need:
Model (fully painted bar weathering)
Gloss varnish
Decal sheet
Hobby knife
Old brush (I actually used the crappy black starter brushes that come with the first couple issues of the Conquest and Mortal Realms magazines)
Tweezers
Small bowl of water
Micro Set
Micro Sol
1. Apply gloss varnish to model
Apply a layer of gloss varnish - don't thin the varnish with anything (medium or water etc.) (I use vallejo because I happen to have a big whopping jar of it, you can use Citadel's Ardcoat or any other). This provides a smooth, even surface for the decal to adhere to. Don't worry about the sheen, we can dull that down later if desired.
Allow this gloss varnish layer to fully dry - this is very important.
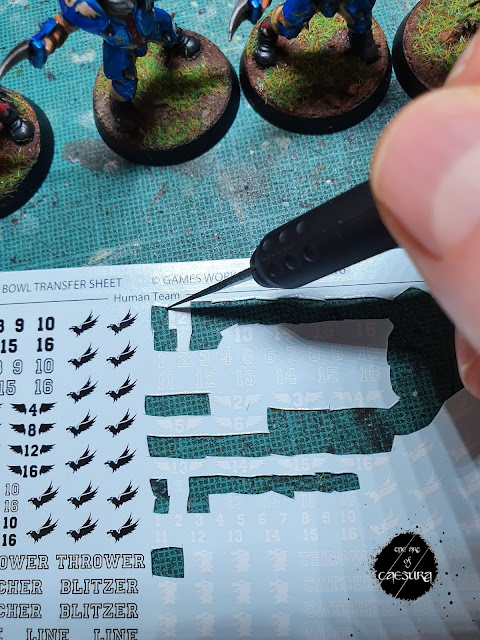
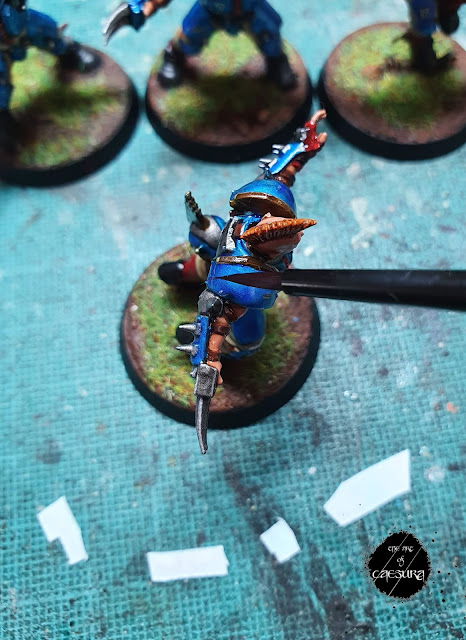
Try to leave a little tab of the decal paper on one side of the cut-out decal where you will grip it with the tweezers. The right lower corner is useful for me, because then I can keep the decal upright (in the position that I am going to apply it) when I grip it with the tweezers in my right hand.
Using an old brush, paint a good layer of Micro Set all over the whole area that you will be applying the decal. Even if it is just going to be a small marking in the middle of a shoulder pad, I would apply the Micro Set to the whole shoulder pad. It dampens the surface of the model, allowing you to move the decal around on the model until you get it into the desired position.
At this stage, position the model so that you will most easily be able to apply the decal in the next step (it might be lying the model on its back / front / standing etc).
As long as you allowed the gloss varnish to dry thoroughly, it won't have any effect on the model. I was a bit hasty one time, painting on the Micro Set before the gloss varnish was fully dry, it caused the gloss varnish to become slightly cloudy and gummy. Luckily I was able to just carefully scrape the gummy gloss varnish off and apply a new smooth layer of gloss varnish. I let it dry fully next time!
In this time the decal will begin to soften and loosen from the decal paper.
Some people hold it in Micro Set instead of water, arguing that the residual drops of water will dilute the Micro Set that you've just painted on the model. I've tried both methods, found no difference to the finish, found dipping in Micro Set much more fiddly (trying to fit the decal in the through the neck of the bottle) or wasteful (pouring Micro Set into a small bowl and then trying to re-pour it back into the bottle). I stick with water.
This part feels like a bit of a time-critical fiddle at first, but if you applied a good layer of Micro Set to the model first (see step 3) then there really is no need to rush.
Lift the damp decal out of the water, give it a brisk shake to get rid of large water droplets on the decal or tips of the tweezers (you can also dab the back side (decal paper) on a bit of paper towel to remove excess water) then bring it to the well-positioned model. Using the old brush that is still damp with Micro Set, slide the decal off the decal paper and onto the desired area of the model.
Depending on how much Micro Set is now under the decal I will either:
While positioning the decal I try to push the sides of the brush bristles against any wrinkled edges of the decal to get excess Micro Set out from under them. Don't worry about persistent wrinkles, they will be dealt with at a later step.
Once the decal is positioned, the Micro Set instructions say to add another layer of Micro Set to the model. I forgo this step, if you choose to do it, apply a VERY THIN layer of Micro Set. Many times I had a perfectly positioned decal lift again and start sliding around at this point.
If you're doing an assembly-line this shouldn't be a problem, just move on to the next model.
This is the best part of the whole process - it's when the decal changes from looking like a cheap temporary tattoo to a proper painted on marking!
This step is a point of no return, up to this point you can still remove the decal by applying more Micro Set to loosen it again, but once you apply Micro Sol you won't be able to remove the decal and will have to paint over it (this happened to me, it's no big deal).
Simply paint Micro Sol over the whole decal. Leave it for a few seconds for the decal to start to soften and then use your brush, still damp with Micro Sol, to gently begin to smooth out wrinkles. The decal will become soft and a bit fragile with the Micro Sol so just be a gentle with it and don't try to smooth out the wrinkle all at once.


Micro Sol only takes a few minutes to dry, and once it does just apply another coat to the decal and continue to gently smooth out the bigger wrinkles.
Once I have repeated steps 8 and 9 maybe three times, I call it a night and let the decals dry and smooth out themselves for a few hours over night.
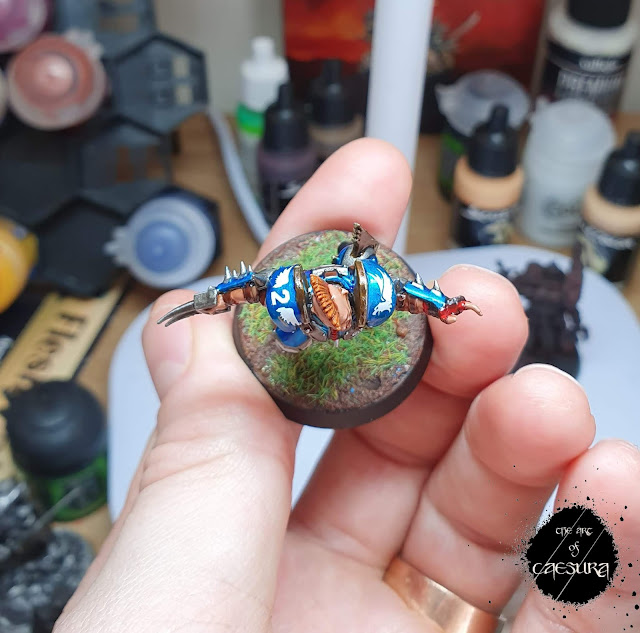

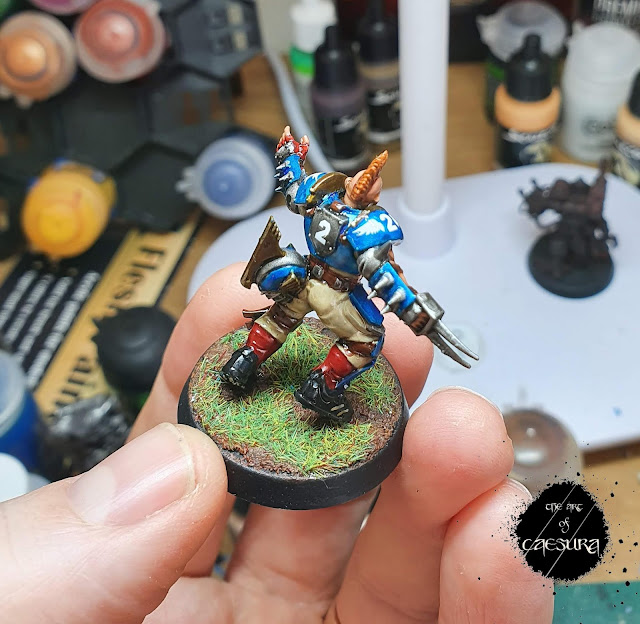

Okay, maybe this is the best part of the whole process! You get to run downstairs in the morning like a child at Christmas and gaze at your painted-on looking decals! Run a thumb along them and marvel at the silky smoothness of the surface. Pure satisfaction.
But to really make the decal blend in to the rest of the model, and to protect all your hard work, we need to varnish and weather it.
Personally, regardless of what finish (matte, satin or gloss) I want in the end, I coat the decaled area with gloss varnish to protect it. After this layer of gloss varnish dries, I apply the weathering. For my Blood Bowl team, this just involved dabbing some Agrax Earthshade on the numbers to dull down the vibrant white, but this could include using the base colour of the model (or silver) to paint chips and dings on the decal to make it look like the decal-marking is weathering off, revealing the underlying paint / bare metal. Some people highlight their decals, or even paint them a completely different colour to blend with their surrounding paint scheme.


11. Final varnish
Once you are satisfied with the weathering, all that remains is to varnish the area (or the entire model) to give it the same finish as the rest of the model / army.
To get different finishes, I use:
- Gloss: Vallejo Gloss Varnish (could use Citadel's Ardcoat)
- Satin: Citadel Stormshield
- Matte: Citadel Lahmian Medium
You could use spray varnishes if you prefer. I have had little experience with these (bar a disastrous incident with "Purity Seal") but I have had a friend, who has spray varnished multiple armies, recommend Army Painter Satin Varnish followed by Army Painter Anti-Shine.
For my Blood Bowl team, once the decal was complete, I varnished the whole model with gloss varnish, then, once dry, varnished everything except the armour with Stormshield, then coated the cloth with Lahmian Medium.
12. Done!
Congrats! Let me know how you got on!
A word on Micro Set and Micro Sol:
Micro Set and Micro Sol are kind of essential if you want to make the decals really look painted on. They can be bought cheaply from the manufacturer in the States, or more expensively off amazon in the EU.
Micro Set is the blue-bottled one, the smellier of the two. It dampens the surface of the model, allowing you to move the decal around on the model until you get it into the desired position. So long as a solvent or varnish hasn't been applied, it can also be used to remove decals.
Micro Sol is a solvent, it actually dissolves the decal, leaving only the pigment on the model. It does not have any effect on the surrounding painted model.
I hope this guide has been helpful. Decals can really open exciting new avenues of hobby. While a little time-consuming at first, they are easy and super snazzy!
See you next week on The Art of Caesura!
Reading: The Porpoise - Mark Haddon
Watching: Tiger King
Next Week:
A new, green threat looms on the horizon...
Online Etymology Dictionary
Welcome back to another glorious Friday on The Art of Caesura!
So, for the past few weeks we've been looking at my first Bowl Team. I've gone into detail about how I painted their armour and faces, but I kept teasing that I would go into detail about how I did the decals at a later time...well, that time has come!
Before we get started, and just so we're all on the same page, I have always called them "decals" (and it was only as I was writing this post that I began to wonder why - see the fascinating etymology above) but many call them transfers. Same thing.
Decals are a great way to apply uniformity across a number of models (or areas of application on one model) without needing to freehand. They're useful for squad markings, tank markings, or player numbers - as I've done here. Like all painting / modelling, the decals need to look like they're part of the finished model, otherwise they'll be jarring and break immersion.
I hope this guide will be useful. I would recommend that you read the whole guide first before you start, just so you have a clear idea of which order you're doing things. I know it looks long, but I've intentionally itemized every step for clarity. Once you've done one or two, you'll be applying decals from start to finish in a couple minutes.
What you'll need:
Model (fully painted bar weathering)
Gloss varnish
Decal sheet
Hobby knife
Old brush (I actually used the crappy black starter brushes that come with the first couple issues of the Conquest and Mortal Realms magazines)
Tweezers
Small bowl of water
Micro Set
Micro Sol
1. Apply gloss varnish to model
Apply a layer of gloss varnish - don't thin the varnish with anything (medium or water etc.) (I use vallejo because I happen to have a big whopping jar of it, you can use Citadel's Ardcoat or any other). This provides a smooth, even surface for the decal to adhere to. Don't worry about the sheen, we can dull that down later if desired.
Allow this gloss varnish layer to fully dry - this is very important.
Here, I've glossed the pauldrons (shoulder pads) of this Blitzer
2. Cut decal out of sheet.
Try to leave a little tab of the decal paper on one side of the cut-out decal where you will grip it with the tweezers. The right lower corner is useful for me, because then I can keep the decal upright (in the position that I am going to apply it) when I grip it with the tweezers in my right hand.
3. Paint on Micro Set
Using an old brush, paint a good layer of Micro Set all over the whole area that you will be applying the decal. Even if it is just going to be a small marking in the middle of a shoulder pad, I would apply the Micro Set to the whole shoulder pad. It dampens the surface of the model, allowing you to move the decal around on the model until you get it into the desired position.
At this stage, position the model so that you will most easily be able to apply the decal in the next step (it might be lying the model on its back / front / standing etc).
As long as you allowed the gloss varnish to dry thoroughly, it won't have any effect on the model. I was a bit hasty one time, painting on the Micro Set before the gloss varnish was fully dry, it caused the gloss varnish to become slightly cloudy and gummy. Luckily I was able to just carefully scrape the gummy gloss varnish off and apply a new smooth layer of gloss varnish. I let it dry fully next time!
4. Submerge the decal in the bowl of water for 45 seconds
In this time the decal will begin to soften and loosen from the decal paper.
Some people hold it in Micro Set instead of water, arguing that the residual drops of water will dilute the Micro Set that you've just painted on the model. I've tried both methods, found no difference to the finish, found dipping in Micro Set much more fiddly (trying to fit the decal in the through the neck of the bottle) or wasteful (pouring Micro Set into a small bowl and then trying to re-pour it back into the bottle). I stick with water.
5. Transfer the decal to the model
This part feels like a bit of a time-critical fiddle at first, but if you applied a good layer of Micro Set to the model first (see step 3) then there really is no need to rush.
Lift the damp decal out of the water, give it a brisk shake to get rid of large water droplets on the decal or tips of the tweezers (you can also dab the back side (decal paper) on a bit of paper towel to remove excess water) then bring it to the well-positioned model. Using the old brush that is still damp with Micro Set, slide the decal off the decal paper and onto the desired area of the model.
6. Position the decal
Depending on how much Micro Set is now under the decal I will either:
- Draw some off (if the decal is just sliding all over the place and will not stay in position) by drying the old brush and using it to wick the Micro Set away from the bottom / edges of the decal.
- Add more Micro Set (if the decal is already sticking to the model surface).
While positioning the decal I try to push the sides of the brush bristles against any wrinkled edges of the decal to get excess Micro Set out from under them. Don't worry about persistent wrinkles, they will be dealt with at a later step.
Once the decal is positioned, the Micro Set instructions say to add another layer of Micro Set to the model. I forgo this step, if you choose to do it, apply a VERY THIN layer of Micro Set. Many times I had a perfectly positioned decal lift again and start sliding around at this point.
7. Leave to dry 15-30min
If you're doing an assembly-line this shouldn't be a problem, just move on to the next model.
8. Paint on Micro Sol
This is the best part of the whole process - it's when the decal changes from looking like a cheap temporary tattoo to a proper painted on marking!
This step is a point of no return, up to this point you can still remove the decal by applying more Micro Set to loosen it again, but once you apply Micro Sol you won't be able to remove the decal and will have to paint over it (this happened to me, it's no big deal).
Simply paint Micro Sol over the whole decal. Leave it for a few seconds for the decal to start to soften and then use your brush, still damp with Micro Sol, to gently begin to smooth out wrinkles. The decal will become soft and a bit fragile with the Micro Sol so just be a gentle with it and don't try to smooth out the wrinkle all at once.


9. Leave Micro Sol to dry and repeat step 8.
Micro Sol only takes a few minutes to dry, and once it does just apply another coat to the decal and continue to gently smooth out the bigger wrinkles.
Once I have repeated steps 8 and 9 maybe three times, I call it a night and let the decals dry and smooth out themselves for a few hours over night.


10. Gloss varnish and weathering
Okay, maybe this is the best part of the whole process! You get to run downstairs in the morning like a child at Christmas and gaze at your painted-on looking decals! Run a thumb along them and marvel at the silky smoothness of the surface. Pure satisfaction.
But to really make the decal blend in to the rest of the model, and to protect all your hard work, we need to varnish and weather it.
Personally, regardless of what finish (matte, satin or gloss) I want in the end, I coat the decaled area with gloss varnish to protect it. After this layer of gloss varnish dries, I apply the weathering. For my Blood Bowl team, this just involved dabbing some Agrax Earthshade on the numbers to dull down the vibrant white, but this could include using the base colour of the model (or silver) to paint chips and dings on the decal to make it look like the decal-marking is weathering off, revealing the underlying paint / bare metal. Some people highlight their decals, or even paint them a completely different colour to blend with their surrounding paint scheme.


 |
| On the right is pre-weathering, on the left is post. |
Once you are satisfied with the weathering, all that remains is to varnish the area (or the entire model) to give it the same finish as the rest of the model / army.
To get different finishes, I use:
- Gloss: Vallejo Gloss Varnish (could use Citadel's Ardcoat)
- Satin: Citadel Stormshield
- Matte: Citadel Lahmian Medium
You could use spray varnishes if you prefer. I have had little experience with these (bar a disastrous incident with "Purity Seal") but I have had a friend, who has spray varnished multiple armies, recommend Army Painter Satin Varnish followed by Army Painter Anti-Shine.
For my Blood Bowl team, once the decal was complete, I varnished the whole model with gloss varnish, then, once dry, varnished everything except the armour with Stormshield, then coated the cloth with Lahmian Medium.
 |
| On the right is pre-decals or varnish and on the left is a completed mini, with decals and final varnish. |
 |
| This picture is taken before weathering the decals, but all of the surfaces have received their final varnish. I think it demonstrates well the different finishes achievable with just one coat of the various varnishes listed above (shiny armour and helmet, satin leather straps and matte pants and socks. |
12. Done!
Congrats! Let me know how you got on!
A word on Micro Set and Micro Sol:
Micro Set is the blue-bottled one, the smellier of the two. It dampens the surface of the model, allowing you to move the decal around on the model until you get it into the desired position. So long as a solvent or varnish hasn't been applied, it can also be used to remove decals.
Micro Sol is a solvent, it actually dissolves the decal, leaving only the pigment on the model. It does not have any effect on the surrounding painted model.
I hope this guide has been helpful. Decals can really open exciting new avenues of hobby. While a little time-consuming at first, they are easy and super snazzy!
See you next week on The Art of Caesura!
Reading: The Porpoise - Mark Haddon
Watching: Tiger King
Next Week:
A new, green threat looms on the horizon...


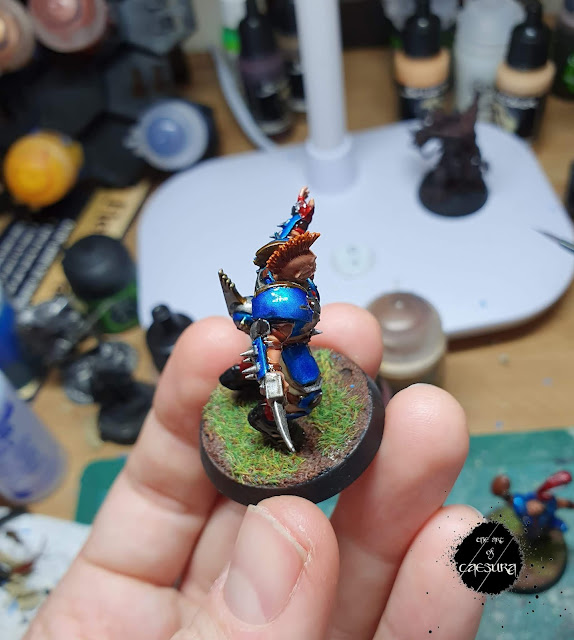





Question: how can you work full time as a GP all week and make time to do this amazing blog?
ReplyDeleteI have a time machine.
Delete